To conduct lecture in classroom using Zoom, ICTO is recommending the following steps:
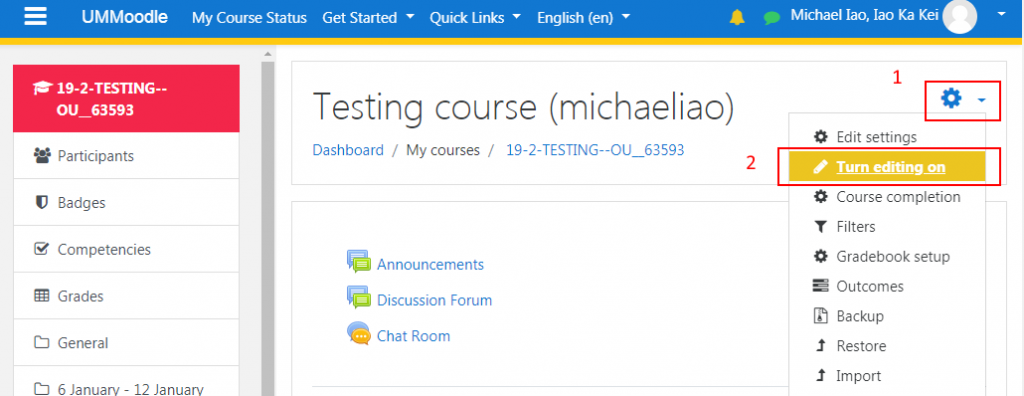
- You can schedule your meeting in UMMoodle:


- Students can join the meeting by clicking the link in UMMoodle

Note: By default, students can join the meeting by clicking the link, without being asked for password. They will enter the waiting room and teacher will need to admit them.
- Connect Cables to Your Laptop
- HDMI for showing the computer screen and playing sound from computer;

- Network cable for stable Internet connection;
Please refer to this FAQ for steps to connect wired network in classroom.

- USB cable for your laptop to capture the voice in classroom if available;
Note: If this USB cable is not available, it is recommended to:- Sit in front of the laptop when lecturing; or;
- Place the laptop under the speaker of the classroom;
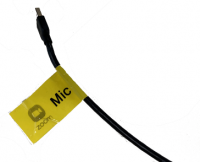
Connect all cables as like below:

- HDMI for showing the computer screen and playing sound from computer;
- Temporarily deactivate unnecessary applications
We recommend to temporarily disable non-relevant programs on your computer that may consume network resources such as operating system updates, network backups, upload or download tasks, software updates etc. Doing this will improve the computer performance during the meeting. - Start the meeting and test the audio
- Click on the Meeting link

- Click “Start Meeting”

- Test speaker and microphone
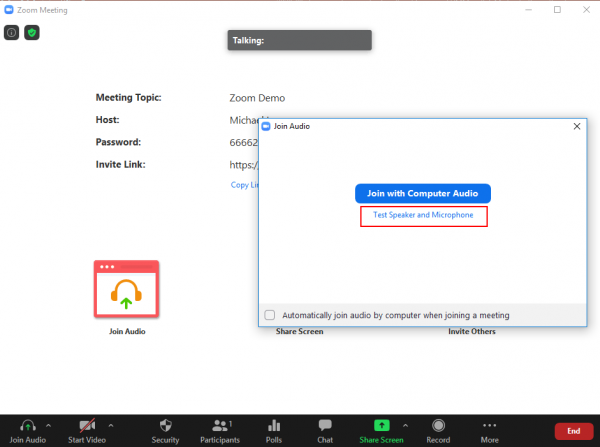
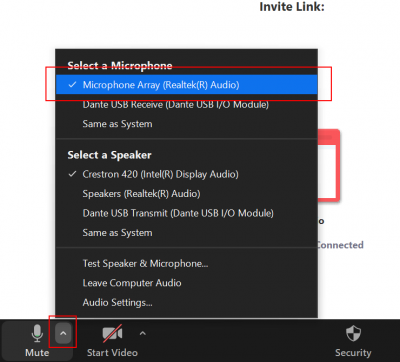
– USB cable for Zoom is available, please select as below: – USB cable for Zoom is NOT available, please select as below: 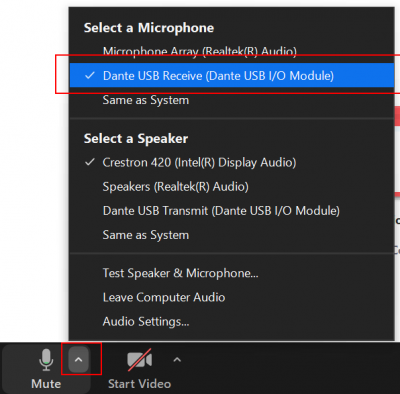
- Click on the Meeting link
- Admit Students to Meeting (Waiting Room Feature)
Students joining will wait in the waiting room and you need to admit them to enter.

You can admin one by one or admit all at once.


- Recording
- To record the meeting, click “Record” and “Record to the Cloud”

- The meeting will be recorded and process in the Zoom’s secured cloud servers
- The recordings will include the following information by default:
- Voice in classroom
- Share screen content
- Timestamp
- Voice from students in Zoom meeting if they are unmuted
- Camera video in classroom and/or from students in Zoom if the camera video is turned on
Important: Students in Zoom meeting will be prompted “This meeting is being recorded” to get their consent. They can either continue to be in the meeting, or leave the meeting. (This is to comply with Act 8/2005 Personal Data Protection Act and the guideline from GPDP)
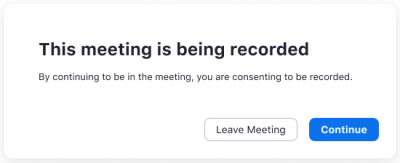
- You may pause and resume the recording when needed (for example, during class break)
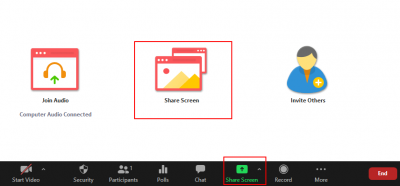

- To record the meeting, click “Record” and “Record to the Cloud”
- Screen Sharing
- You may use this feature to share your computer screen to students in Zoom meeting. (Similar to sharing your computer screen to projector in classroom)
- We recommend to share the application (e.g. PowerPoint, Internet Browser, etc.) instead of entire computer screen due to privacy concerns.

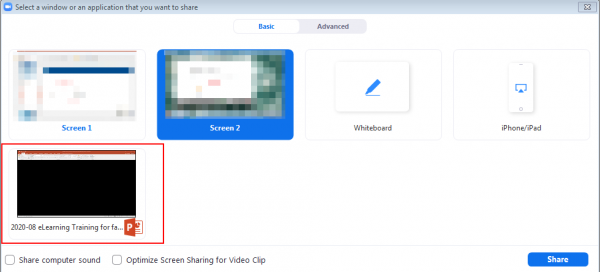
- If you need to share another application (for example, share a YouTube video in Internet Browser when presenting a PowerPoint), you may click “New Share” and select the application to share

- You may pause or stop the share whenever necessary (for example, during class break)

- If you want students to hear the sound played on the computer, you may do as following:
- Selecting the application to share by click “Share computer sound”, or
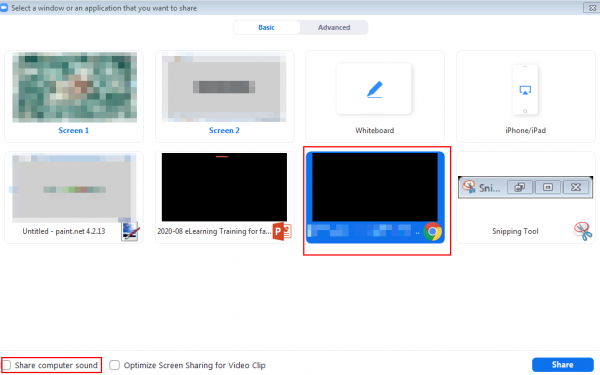
- Already sharing the application, click “More” -> “Share computer sound”

- Selecting the application to share by click “Share computer sound”, or
- Handwriting Sharing
- Option 1: Use a webcam and classroom’s whiteboard: You can draw on the whiteboard and let the participants see it via your webcam.

- Option 2: Use the whiteboard feature in Zoom. This feature will allow you to share a whiteboard that you can draw, type, and add stickers on your screen directly using a mouse. You can also save the Whiteboard as a PNG file.

- Option 1: Use a webcam and classroom’s whiteboard: You can draw on the whiteboard and let the participants see it via your webcam.
- The recording will be processed in Zoom’s secured cloud servers after you end the meeting. You do not need to keep your laptop on for the recording to be processed;
- You may start another new meeting with cloud recording immediately. You do not need to wait for previous recording to complete processing;
- By default, a password is required for anyone to view the recordings;
- The recording will be kept on the server until the end of semester; Download a copy for yourself if needed;
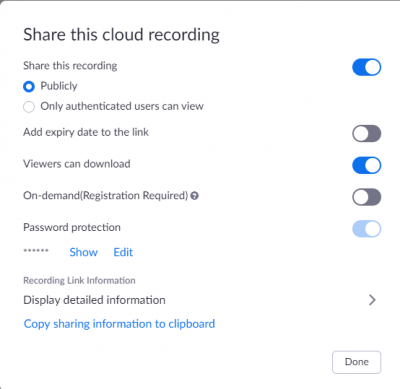
- An email notification will be sent to you when the recording has completed, with a link for you to manage the recording, and another link for you to share the recording with students;

- You may manage the recording with following options:
- Delete the recording;
- Configure how it be shared;
- View the recording;
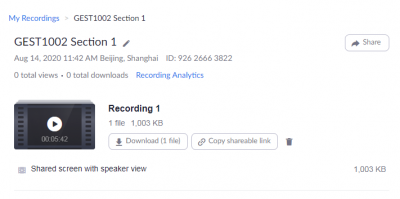
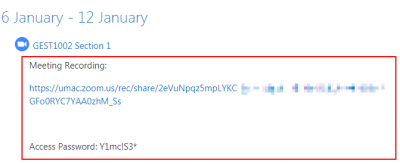
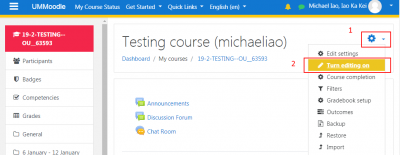
- Share the link in UMMoodle


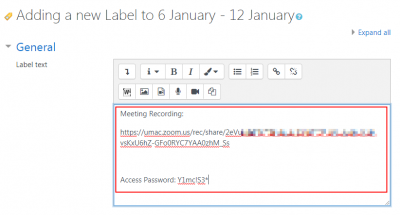
- Paste the link with the access password
- Students can open the recording by clicking the link in UMMoodle by typing the password
